When you’re planning a timber pergola, you’ll quickly discover that skipping vital steps during the design and construction phases can lead to costly mistakes. From selecting the wrong wood species for your climate to overlooking foundation requirements and building codes, these oversights compound over time. Understanding what to avoid before you begin will save you money and frustration—but where should you actually start?
Choose the Right Wood Species for Your Climate
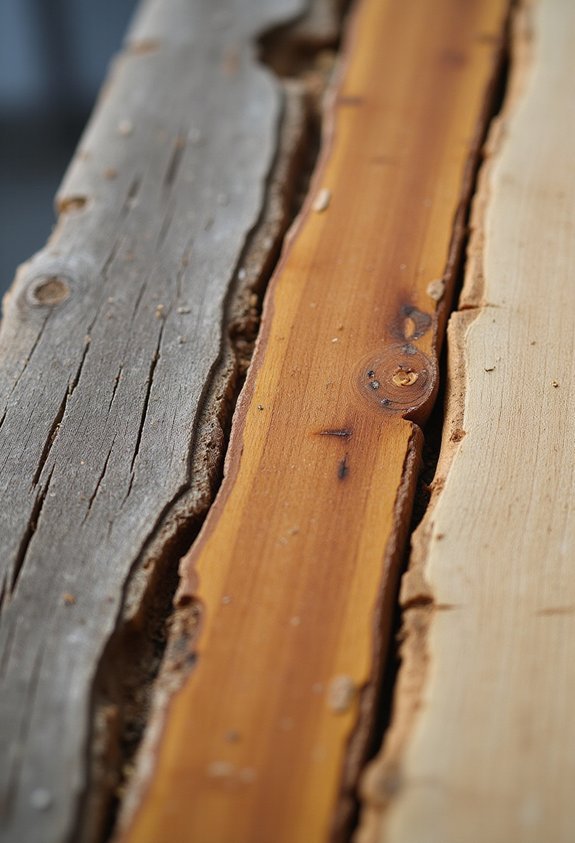
When you’re building a timber pergola, one of the most critical decisions you’ll make involves selecting the right wood species for your specific climate, because the wood you choose will directly determine how long your pergola lasts and how much maintenance it’ll require over time. You’ll need to consider your region’s temperature fluctuations, humidity levels, and rainfall patterns. Hardwoods like cedar and redwood naturally resist decay in wet climates, while pressure-treated lumber works well in areas with high moisture. In arid regions, you can use less expensive softwoods. Research local wood recommendations by consulting with nurseries or contractors familiar with your area’s conditions. This groundwork prevents costly mistakes and guarantees your pergola withstands decades of weather exposure.
Design Your Pergola’s Style Before Shopping for Materials
Before you head to the lumber yard or browse online catalogs, you’ll want to sketch out your pergola’s design and style, because having a clear vision of what you’re building prevents impulse purchases and guarantees all your materials work together cohesively. Consider whether you want a modern, traditional, or rustic aesthetic, as this choice determines beam thickness, spacing patterns, and finish options. Think about your pergola’s purpose—will it provide shade, support climbing plants, or serve as a focal point? Measure your space carefully and decide on dimensions, roof angle, and post placement. Document your design with drawings or photos, including specific measurements and material preferences. This preparation verifies you’ll purchase exactly what you need without waste or costly mistakes.
Calculate Post Footings and Foundation Depth Correctly
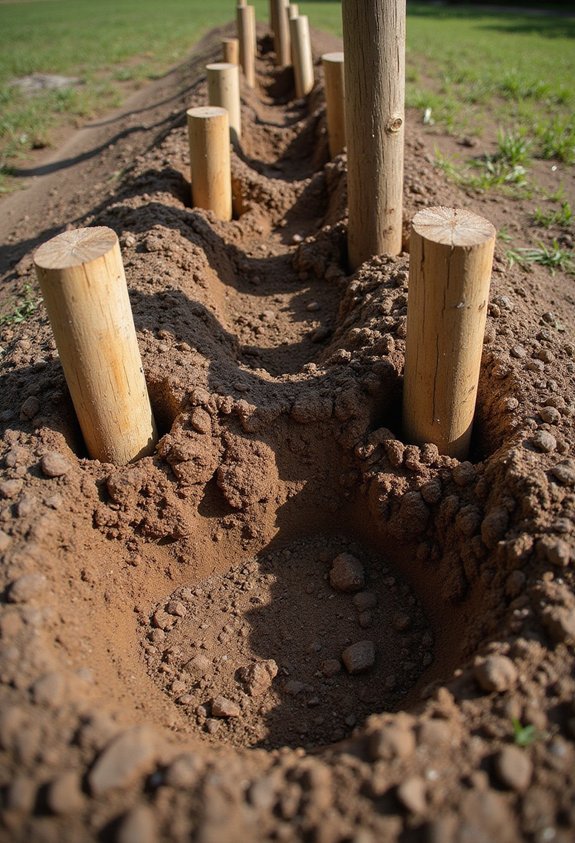
Proper post footings and foundation depth are critical structural elements that’ll determine whether your pergola stands firm for years or shifts and settles unevenly over time. You must dig post holes below your region’s frost line, which is the depth where soil doesn’t freeze and expand seasonally. This depth varies considerably by location, so you’ll need to check local building codes or contact your county extension office for accurate information. Typically, holes should extend 12 to 48 inches deep depending on your climate. You’ll also want to use concrete footings that extend above ground level, creating a solid base that prevents moisture from rotting your wooden posts. Skipping this step invites structural failure and costly repairs down the road.
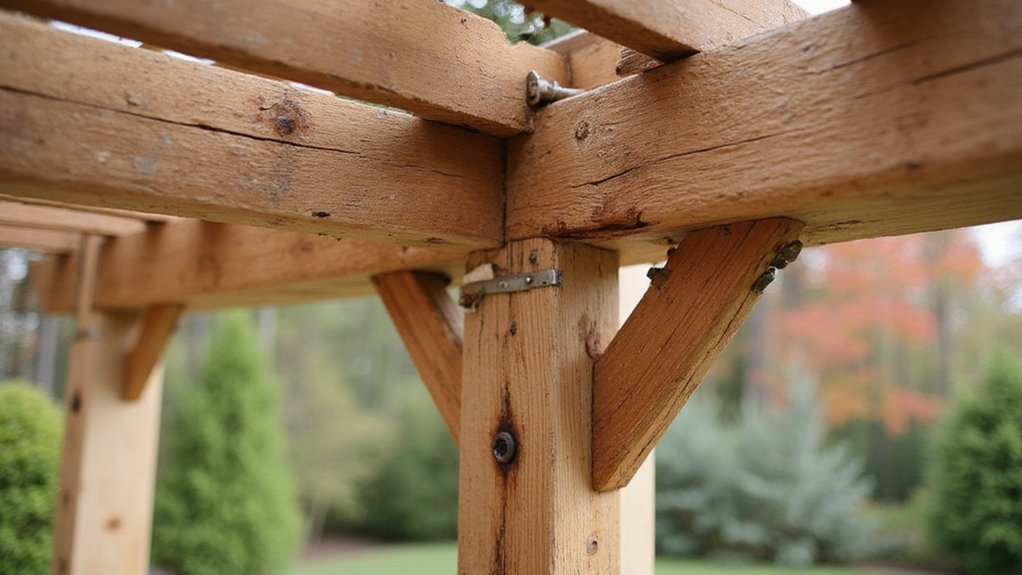
Space Posts and Beams to Handle Real Structural Loads
The spacing between your posts and beams isn’t something you should guess at or copy from another pergola you’ve seen, because every structure’s needs depend on the size of your pergola, the type of wood you’re using, and the loads it’ll actually bear—including snow accumulation, wind pressure, and the weight of climbing plants or shade materials you might add later. You’ll need to consult local building codes and span tables specific to your wood species to determine maximum safe distances between supports. Undersizing this spacing creates weak points where beams deflect or fail, while oversizing wastes materials and money. Calculate the total load your pergola must support, then reference engineering tables to guarantee your post spacing and beam dimensions work together safely for your climate and intended use.
Protect Your Timber Pergola From Water and Rot
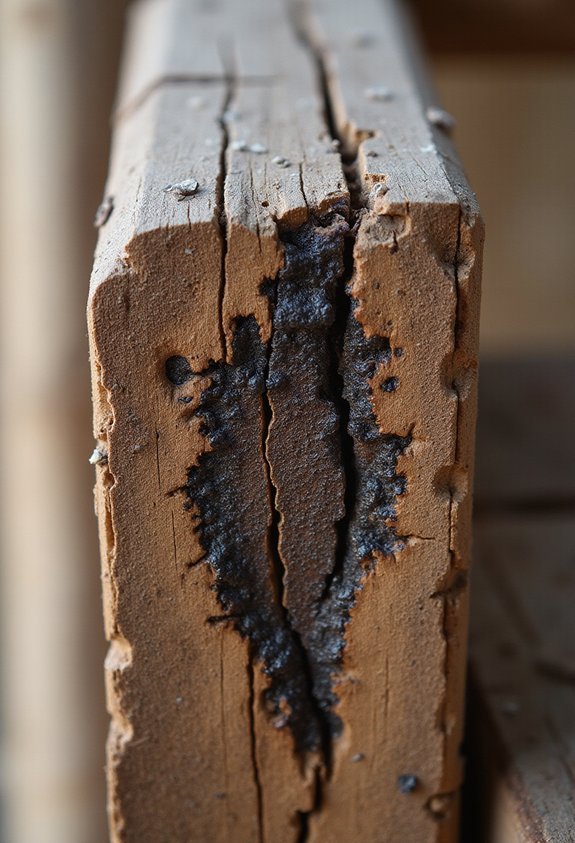
Water damage poses one of the greatest threats to your timber pergola‘s longevity, since wood that’s constantly exposed to moisture will eventually rot, weaken, and fail structurally. You’ll want to apply a water-resistant sealant or stain to all exposed wood surfaces, including the tops and undersides of beams and posts, because these areas collect moisture that accelerates decay. Additionally, you should guarantee proper drainage by sloping your pergola’s roof structure so water runs off quickly rather than pooling. Install gutters or drip edges to direct water away from vertical supports, and consider using pressure-treated lumber for posts that contact the ground or concrete. Regular maintenance—resealing every two to three years—will extend your pergola’s lifespan significantly and prevent costly repairs down the road.
Engineer Wind Bracing Into Your Design
Many builders overlook wind resistance when designing their timber pergolas, but this structural consideration is just as critical as water protection because strong winds can topple an unstable structure or cause serious damage to your property and anyone nearby. You’ll want to engineer adequate bracing by installing diagonal cross-bracing or knee braces at corners, which greatly strengthens your pergola against lateral forces. Guarantee your posts sink deep into concrete footings, typically 2-3 feet below ground level, providing essential stability. You should also consider your local wind speeds and design accordingly, using larger diameter posts and additional reinforcement in high-wind regions. Consult local building codes, which often specify minimum bracing requirements based on your area’s climate conditions and historical weather patterns.
Verify Building Codes and Pull Permits Early
Building codes and permit requirements exist alongside structural considerations like wind bracing because they’re established to protect both your property and your community’s safety standards. You’ll need to contact your local building department early in your planning process, as permit timelines can extend several weeks or months. Different municipalities have varying requirements for pergola height, setback distances from property lines, and attachment methods to existing structures. You shouldn’t assume that your neighbor’s pergola design complies with current regulations, since codes update regularly. Pulling permits before construction safeguards you legally and verifies that your timber pergola meets all safety requirements. Skipping this step can result in costly fines, removal orders, or complications when selling your property.
Use Outdoor-Rated Hardware and Fasteners
Why would you use regular hardware on a structure that’ll face constant exposure to rain, sun, and temperature changes? Standard fasteners and bolts rust quickly, compromising your pergola’s structural integrity and creating safety hazards. Instead, you’ll want to invest in outdoor-rated hardware specifically designed to withstand harsh weather conditions. Look for stainless steel, galvanized, or hot-dipped galvanized fasteners that effectively avert corrosion. These materials cost more upfront but prevent costly repairs and replacements down the road. When selecting screws, bolts, and brackets, verify that they’re rated for exterior use. Matching your hardware material to your wood type guarantees compatibility and longevity. This deliberate choice safeguards your investment and ensures your pergola remains structurally sound for years.
Plan for Ongoing Wood Staining and Maintenance
Once you’ve constructed your timber pergola with quality materials and proper fasteners, the work doesn’t end there—you’ll need to commit to regular staining and maintenance to preserve its appearance and structural integrity. Without proper care, wood will deteriorate from sun exposure, moisture, and weather damage, leading to costly repairs or replacement. You should plan to restain your pergola every two to three years, depending on your climate and wood type. Before applying new stain, you’ll need to sand the surface to remove old stain and address any surface damage. Additionally, inspect the wood regularly for signs of rot, mold, or insect damage, treating problems immediately when detected to prevent spreading and further deterioration throughout the structure.
Check Local HOA Rules and Setback Requirements
Before you break ground on your timber pergola project, you’ll need to check with your local homeowners association (if you have one) and municipal building department to understand the rules and restrictions that apply to your property. Many HOAs establish specific guidelines about structure height, materials, color, and placement that you must follow. Additionally, setback requirements dictate how far your pergola must be positioned from property lines, neighboring homes, and easements. Building codes in your area may also require permits before construction begins. Violating these regulations can result in fines, forced removal of your structure, or legal disputes with neighbors. Taking time to research and abide by these requirements upfront prevents costly mistakes and guarantees your pergola project proceeds smoothly and legally.
Conclusion
You’ll avoid costly mistakes by addressing each planning step methodically, from selecting climate-appropriate wood species to verifying building codes before construction begins. Don’t let your pergola become a telegraph of poor planning by skipping maintenance schedules, foundation calculations, or hardware specifications. You’re investing in a long-term structure, so you’ll protect your timber investment through consistent sealing, pest monitoring, and structural inspections that guarantee decades of durability.