Planning a timber pergola project can feel exciting at first, especially when you imagine long summer evenings under filtered light or weekend gatherings shaded from the heat. Yet many homeowners quickly discover that without a clear plan, small decisions begin to pile up and create confusion about budget, materials, and timing.
You may have seen a neighbor install a pergola in what seemed like a few simple steps, but behind that finished structure was careful planning that often goes unnoticed. A timber pergola is not just a decorative feature, it becomes part of how you use your outdoor space every day. Taking the time to plan properly ensures that what you build feels intentional, durable, and aligned with both your lifestyle and your local climate.
Step 1: Define Your Purpose and Vision
How Will You Use the Pergola?
Before you think about measurements or materials, you need clarity about how you actually want to use the space. If your goal is hosting family dinners, you will need enough room for a dining table and movement around it, whereas a quiet reading nook requires far less square footage. You may picture festive gatherings, but it helps to ask yourself how often those events realistically occur compared to everyday use. Designing for your true habits rather than occasional moments prevents overspending and overcrowding. When your pergola reflects your daily rhythm instead of an idealized scenario, it becomes a natural extension of your home.
Determine Size and Layout
Measuring your backyard carefully is more important than many people realize, because even a few extra feet can change both cost and functionality. You need to consider not just the footprint of the pergola but also walking paths, furniture placement, and how the structure interacts with existing landscaping. A pergola that looks proportionate in photos may overwhelm a small yard or feel undersized in a large one. Sketching the layout or marking corners with stakes can help you visualize the scale before committing. Thoughtful sizing prevents regret and ensures the structure feels balanced rather than intrusive.
Set Realistic Expectations
Budget and timeline should be part of your early planning conversation, not something addressed after design decisions are made. You might feel tempted to stretch your budget for extra features, but clarity about your limits helps you prioritize what truly matters. Weather conditions, contractor availability, and permit approval can also affect your timeline, especially during peak building seasons. Allowing flexibility in your schedule reduces stress and avoids rushed decisions. Realistic expectations make the entire process smoother from concept to completion.
Step 2: Understand Your Climate and Location
Weather Considerations
Climate influences nearly every structural decision in a pergola project, even if it is not immediately visible. If you live in a snow-prone region, roof pitch and beam thickness must support seasonal weight without sagging. In windy areas, anchoring systems and lateral support become critical for long-term stability. Sun direction also affects comfort, as afternoon heat can make certain orientations less pleasant. Designing with your specific weather patterns in mind ensures that the pergola performs reliably throughout the year.
Soil and Ground Conditions
The ground beneath your pergola plays a quiet but crucial role in structural integrity. Soil type determines how deep footings should go and how well the structure will resist movement over time. In colder climates, frost lines require deeper foundations to prevent heaving during freeze-thaw cycles. Poor drainage can also cause long-term issues if water collects around posts. Evaluating soil conditions early prevents costly structural corrections later.
Regional Building Differences
Building regulations vary between regions, and they often reflect local climate realities. In colder areas, structural requirements may include specific snow load ratings or foundation depths. In warmer regions, wind resistance standards may take priority. You need to understand these differences before construction begins to avoid delays or compliance issues. Planning with regional rules in mind protects both your investment and your peace of mind.
Step 3: Choose the Right Timber
Wood Types Explained
Selecting timber involves balancing cost, durability, and visual appeal. Pine is often budget-friendly but may require more maintenance, while cedar and redwood offer natural resistance to rot and insects. Hardwoods provide exceptional strength but increase upfront cost and installation complexity. Each option comes with trade-offs that affect both performance and maintenance. Choosing the right wood ensures your pergola ages gracefully rather than deteriorating prematurely.
Light Timber vs Heavy Timber
Timber thickness significantly impacts structural performance and overall aesthetic. Light timber creates a refined, open look and often suits moderate climates, while heavy timber delivers greater load-bearing capacity and visual presence. If you live in a region with harsh winters, heavier beams may offer long-term reassurance. In milder climates, lighter timber may provide sufficient strength without unnecessary expense. Matching beam size to environmental demand prevents structural overbuilding or underperformance.
Durability and Maintenance Expectations
No timber is maintenance-free, but some require more attention than others. Regular sealing, staining, and inspections protect wood from moisture and UV exposure. In humid climates, moisture resistance becomes critical, while in sunny regions UV protection takes priority. You must commit to a maintenance schedule that aligns with your chosen wood type. Thoughtful upkeep extends the lifespan of your pergola significantly.
Step 4: Decide on Design and Structure
Attached vs Freestanding Pergola
An attached pergola integrates with your home’s existing structure, offering convenience and potentially reduced material use. A freestanding design provides more placement flexibility and can define a separate outdoor room. Your decision depends on yard layout, structural considerations, and aesthetic goals. Each option affects foundation requirements and design possibilities. Evaluating how you move through your space helps determine which structure feels most natural.
Roof Style Options
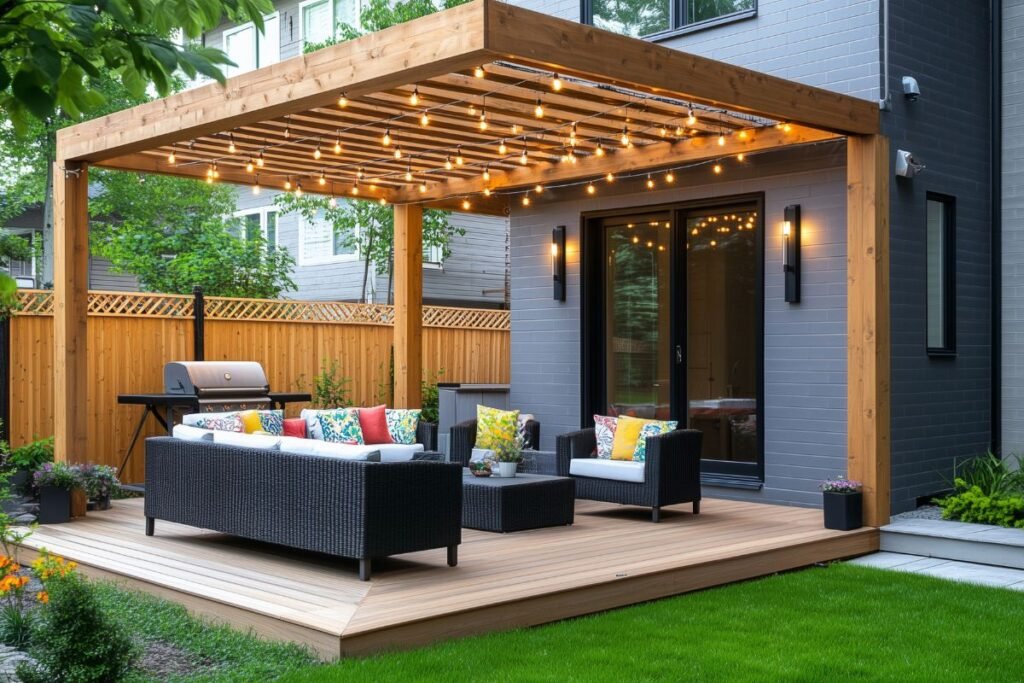
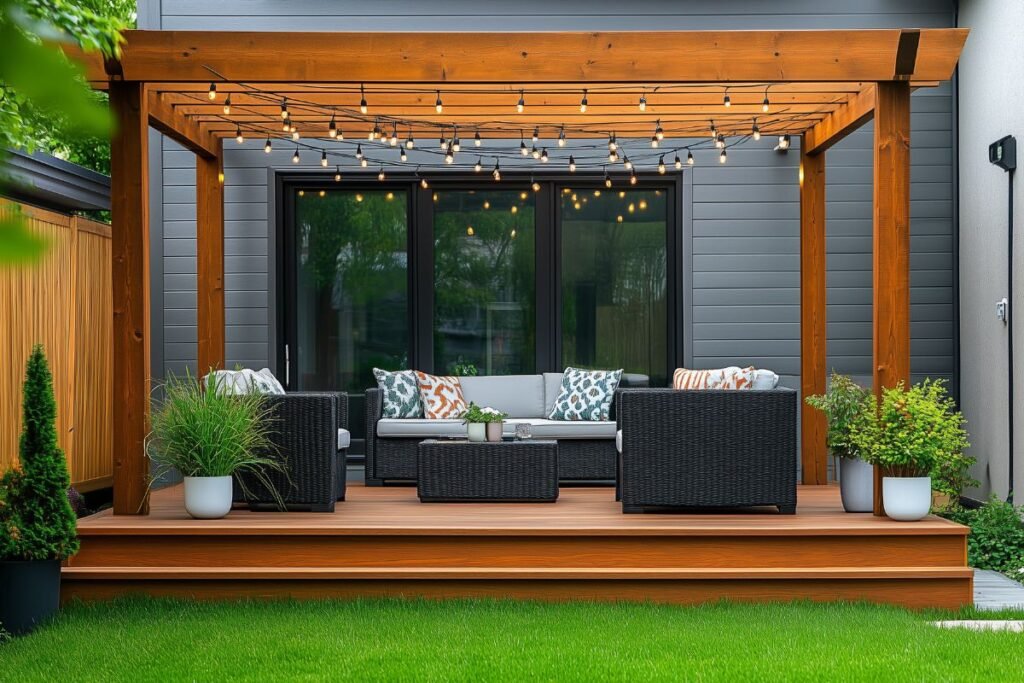
Roof style influences both functionality and appearance. Open slats allow filtered sunlight and airflow, while solid roofs provide protection from rain and snow. Polycarbonate panels let light through without full exposure, and metal roofing offers durability. Your choice should reflect both climate and intended use. Balancing comfort with aesthetics ensures year-round enjoyment.
Style and Architectural Match
A pergola should complement your home rather than compete with it. Modern homes may benefit from clean lines and minimalist detailing, while traditional homes often pair well with heavier timber elements. Considering architectural harmony prevents visual imbalance. You want the structure to feel intentional rather than added as an afterthought. Design coherence enhances overall property value.
Step 5: Budgeting the Project Properly
Material Costs
Material costs depend on timber type, beam size, roofing materials, and hardware. Larger structures require more lumber and potentially stronger foundations. You may need to adjust your design to stay within budget without sacrificing quality. Prioritizing structural integrity over decorative extras often proves wise. Transparent budgeting helps prevent financial strain mid-project.
Labor and Installation
Professional installation adds cost but ensures structural accuracy and code compliance. DIY projects can reduce expenses but require skill, tools, and time commitment. Mistakes during installation can lead to expensive corrections. Evaluating your capabilities honestly protects both safety and budget. Proper installation preserves long-term structural reliability.
Hidden Costs to Consider
Hidden costs often include permits, site preparation, electrical wiring, and finishing materials. These expenses can accumulate quickly if not anticipated early. Factoring them into your initial budget prevents unpleasant surprises. Clear financial planning strengthens project confidence. Preparation ensures smoother execution.
Step 6: Permits and Building Codes
When Permits Are Required
Permit requirements vary by location, often based on structure size or roof coverage. You must check local regulations before breaking ground. Ignoring permits can lead to fines or forced modifications. Compliance protects both safety and resale value. Responsible planning includes legal preparation.
Structural Requirements
Building codes often specify snow load, wind resistance, and foundation depth. These requirements exist to protect homeowners from structural failure. Meeting code ensures safety during extreme weather. Engineering specifications should align with regional standards. Code compliance safeguards long-term performance.
Inspection and Compliance
Inspections verify that construction meets approved standards. Though sometimes viewed as bureaucratic, they protect structural integrity. Passing inspection provides documentation for future property transactions. Compliance builds trust in your investment. Proper documentation adds long-term security.
Step 7: Foundation and Installation Planning
Footing Options
Concrete footings provide the most stable base, especially for larger structures. Deck mounting may suit smaller pergolas but depends on deck strength. Slab installations offer clean integration with patios. Choosing the right footing prevents shifting over time. Stability begins below ground.
Site Preparation
Leveling, grading, and drainage planning ensure proper structural alignment. Uneven ground can cause long-term structural stress. Proper preparation prevents water accumulation around posts. Site readiness influences overall durability. Investing time here avoids future repairs.
Timeline Expectations
Construction timelines vary depending on weather, material availability, and contractor schedules. Delays are common during peak seasons. Allowing buffer time reduces pressure and rushed decisions. A realistic timeline keeps expectations aligned with reality. Patience improves final outcomes.
Step 8: Finishing, Sealing, and Protection
Staining and Sealing Options
Finishes protect timber from moisture and UV damage. Oil-based stains penetrate deeply, while water-based options offer easier cleanup. Choosing the right finish depends on climate and wood type. Proper application extends lifespan significantly. Finishing is a protective investment.
UV and Moisture Protection
Sun exposure fades untreated wood, while moisture accelerates decay. Protective coatings guard against both elements. You should reapply finishes periodically based on climate exposure. Preventative care reduces costly repairs. Climate-aware maintenance supports longevity.
Maintenance Schedule
Annual inspections help identify minor issues before they escalate. Cleaning, sealing, and hardware checks maintain structural integrity. Routine care becomes part of ownership responsibility. Consistent maintenance preserves appearance and performance. Discipline here ensures lasting satisfaction.
Step 9: Furnishing and Making It Functional
Lighting and Electrical Planning
Integrated lighting transforms your pergola into an evening retreat. Planning electrical routes early simplifies installation. Proper wiring must comply with safety codes. Lighting enhances usability and ambiance. Thoughtful planning prevents retrofitting complications.
Shade and Privacy Options
Curtains, screens, and shade panels add comfort and privacy. These features adapt your pergola to seasonal changes. Strategic placement improves usability. Comfort upgrades elevate daily enjoyment. Personalization makes the space uniquely yours.
Furniture Layout Strategy
Furniture selection should reflect intended use and available space. Avoid overcrowding while ensuring functional flow. Durable, weather-resistant materials enhance longevity. Layout affects comfort and accessibility. Intentional arrangement maximizes usability.
Common Mistakes to Avoid
Rushing into construction without clear planning often leads to regret. Underestimating climate impact compromises structural integrity. Choosing timber based solely on price can reduce durability. Skipping permits invites legal complications. Ignoring maintenance shortens lifespan.
Final Checklist Before You Build
Confirm your purpose, finalize your budget, and secure permits before construction begins. Verify timber selection aligns with climate demands. Ensure foundation plans meet local codes. Select qualified contractors if needed. Careful preparation guarantees smoother execution.
Choosing a Region-Specific Timber Pergola Solution
Once your planning framework is complete and you understand your climate, timber type, and structural needs, the final step is evaluating region-specific options. Homeowners researching a timber pergola USA often need to account for diverse climate zones ranging from humid coastal areas to snow-prone northern states, which means structural specifications may vary significantly even within the same country. Canadian homeowners, on the other hand, typically prioritize snow load capacity, frost-depth foundations, and long winter durability when exploring a timber pergola Canada, since winter conditions tend to be more consistently demanding across many provinces. Recognizing these regional distinctions ensures you are not simply choosing a design, but selecting a structure engineered for your environment.
Looking at solutions tailored to your country helps you compare beam sizing, roof options, and foundation requirements with greater confidence. Instead of adapting a generic design that may not suit local conditions, you are reviewing specifications aligned with national building standards and weather realities. This approach reduces uncertainty and minimizes the risk of costly structural adjustments later. A timber pergola built with regional performance in mind ultimately delivers greater long-term satisfaction and structural reliability.
FAQs
How long does it take to build a timber pergola?
Typically one to three weeks depending on size and complexity.
Do I need a permit for a timber pergola?
Often yes, especially for larger or roofed structures.
What is the best timber for a pergola?
Cedar and hardwoods offer durability, but climate suitability matters most.
Should I hire a professional or build it myself?
Hire a professional if structural complexity or permits are involved.
How much should I budget for a timber pergola?
Budget depends on size, material, and design, but plan for materials, labor, and permits.
Conclusion
Planning a timber pergola project from start to finish requires thoughtful evaluation of purpose, climate, materials, and budget. When you approach each step deliberately, the result feels cohesive and enduring. Your pergola becomes more than a shade structure; it becomes part of your home’s character and daily life. Investing time in planning protects both financial and emotional investment. With careful preparation, your timber pergola will serve you reliably for many years.